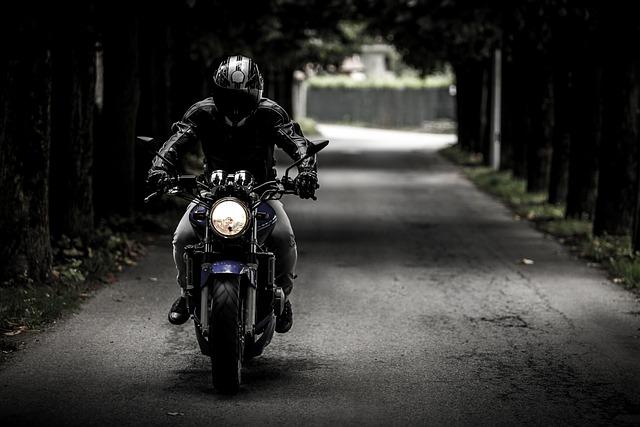
Ready to take your motorcycle to the next level? Discover the art of tank painting and learn how to transform your bike into a work of art like a pro. Whether you’re a seasoned rider or just starting out, this guide will show you everything you need to know to achieve a flawless finish on your motorcycle tank. Let’s rev up those paintbrushes and get started!
Choosing the Right Paint Colors and Finishes
When it comes to painting your motorcycle tank, the right colors and finishes can make all the difference. Whether you’re looking to give your ride a sleek, modern look or a classic, vintage feel, choosing the perfect paint can help you achieve the desired aesthetic.
To ensure your tank painting project turns out like a pro, consider the following tips:
Choosing the Right Colors
- Select colors that complement your bike’s overall appearance
- Take into account your personal style and preferences
- Consider the durability and longevity of the paint
Selecting the Ideal Finish
- Matte finishes offer a modern and understated look
- Gloss finishes provide a shiny, eye-catching appearance
- Satin finishes offer a balance between matte and gloss
By carefully selecting the paint colors and finishes for your motorcycle tank, you can create a custom look that reflects your personality and style. With a little bit of time and effort, you can transform your ride into a work of art that truly stands out on the road.

Tools and Supplies You Need for a Professional Finish
When it comes to painting your motorcycle tank, having the right tools and supplies is essential for achieving a professional finish. Here are some key items you’ll need to ensure your tank artistry project turns out like a pro:
- Primer: A high-quality primer will help your paint adhere to the surface of the tank and create a smooth base for painting.
- Paint: Choose a durable paint specifically designed for use on motorcycles to ensure a long-lasting and vibrant finish.
- Paint Brushes or Sprayers: Depending on your preference, you can use paint brushes or sprayers to apply the paint smoothly and evenly.
- Sandpaper: Use sandpaper of varying grits to prepare the surface of the tank for painting and to smooth out any imperfections.
- Cleaner and Tack Cloths: Make sure to clean the tank thoroughly before painting and use tack cloths to remove any dust or debris that could affect the finish.

Prepping Your Motorcycle Tank for Painting
To achieve a professional-looking finish when painting your motorcycle tank, it is crucial to properly prep the surface beforehand. This step is essential for ensuring the paint adheres correctly and lasts for a long time. Here are some tips on like a pro:
**1. Clean the Tank:** Start by thoroughly cleaning the tank to remove any dirt, grime, or grease. Use a degreaser and a lint-free cloth to wipe down the surface and ensure it is free of any contaminants.
**2. Sand the Surface:** Next, use sandpaper to rough up the surface of the tank. This will help the paint adhere better and create a smoother finish. Start with a coarse grit sandpaper and gradually move to a finer grit for a polished look.
**3. Prime the Tank:** After sanding, apply a primer to the tank to create a smooth base for the paint. This will help the paint bond to the surface and prevent any chipping or peeling. Make sure to apply the primer evenly and let it dry completely before painting.
Choosing the Right Painting Technique for Your Skill Level
Getting Started
When it comes to painting your motorcycle tank, the first step is . Whether you’re a beginner or a seasoned painter, there are a few different methods you can use to achieve professional-looking results. Here are some tips to help you choose the best painting technique for your skill level:
- Beginner: If you’re new to painting, consider starting with basic techniques like solid colors or simple designs. You can also use stencils to add intricate patterns without the need for advanced painting skills.
- Intermediate: For those with some painting experience, try experimenting with blending colors, shading, and adding texture to your tank. Techniques like airbrushing can help you achieve more complex designs.
- Advanced: If you’re a skilled painter looking to take your tank artistry to the next level, consider techniques like custom painting, pinstriping, or hand-lettering. These advanced methods require precision and practice but can result in stunning, one-of-a-kind designs.

Adding Personal Touches and Custom Details
Personalizing your motorcycle tank with unique touches and custom details is a great way to showcase your individual style and make your bike stand out from the crowd. Whether you’re a seasoned artist or a beginner looking to try your hand at tank painting, there are plenty of creative options to explore.
One popular technique is to incorporate intricate designs or patterns using stencils or freehand painting. This allows you to add a personal touch to your tank that reflects your personality and interests. Consider adding bold stripes, geometric shapes, or even intricate tribal motifs to make your tank truly one-of-a-kind.
Another fun idea is to experiment with different color schemes and finishes to give your tank a unique look. From bold, glossy colors to matte or metallic finishes, the possibilities are endless. Don’t be afraid to get creative and mix and match colors to create a visually stunning masterpiece that will turn heads wherever you ride.

Avoiding Common Mistakes and Pitfalls
When painting your motorcycle tank, it’s important to avoid common mistakes and pitfalls to achieve a professional look. Here are some tips to help you navigate through the process smoothly:
- Preparation is key: Make sure to properly clean and sand your tank before starting the painting process. This will ensure better adhesion and a smoother finish.
- Use quality materials: Invest in high-quality paint, primer, and clear coat to achieve a long-lasting and durable finish. Don’t skimp on materials, as they can make a big difference in the final result.
- Take your time: Rushing through the painting process can lead to mistakes and imperfections. Take your time to carefully apply each coat of paint and allow for proper drying between coats.
| Common Mistakes | Pitfalls to Avoid |
|---|---|
| Skipping the primer | Not allowing for proper drying time between coats |
| Using cheap paint | Not properly sanding the tank before painting |
| Not using a clear coat | Rushing through the painting process |

Caring for and Maintaining Your Painted Motorcycle Tank
One of the most eye-catching aspects of a motorcycle is its painted tank. Whether you have a custom design or a classic solid color, maintaining the paint job is essential to keeping your bike looking sharp. Here are some tips and tricks to care for and maintain your painted motorcycle tank like a pro:
- Regular Cleaning: Keep your tank clean by regularly washing it with mild soap and water. Avoid harsh chemicals that can damage the paint.
- Waxing: Apply a coat of wax to protect the paint and give it a glossy finish. Be sure to use a wax specifically designed for motorcycle paint.
- Touching Up: If you notice any chips or scratches in the paint, touch them up promptly to prevent rust from forming. Match the paint color as closely as possible for a seamless repair.
| Type of Maintenance | Frequency |
|---|---|
| Regular Cleaning | Weekly |
| Waxing | Every 1-2 months |
| Touching Up | As needed |
By following these simple steps, you can keep your painted motorcycle tank looking like new for years to come. Remember, a well-maintained paint job not only enhances the visual appeal of your bike but also protects the metal underneath from corrosion. So, show off your tank artistry with pride and ride in style!
Finishing Touches: Clear Coating and Buffing for a Glossy Shine
After carefully painting your motorcycle tank to perfection, it’s time to add the finishing touches to achieve that glossy shine. Clear coating is essential in protecting your paint job from UV rays, scratches, and other environmental factors. Applying a clear coat not only enhances the colors of your design but also gives it a professional finish.
Before applying the clear coat, make sure to buff the surface of the tank to a smooth finish. Buffing helps to remove any imperfections, such as dust particles or uneven spots, that may have appeared during the painting process. By buffing the tank, you’ll ensure a flawless final result that will make your bike stand out on the road.
To achieve a glossy shine that will turn heads, follow these steps:
– Use a high-quality clear coat specifically designed for motorcycle tanks.
– Apply the clear coat in thin, even layers to prevent runs and drips.
– Allow each layer to dry completely before applying the next one.
– Once the clear coat is applied, let it cure for the recommended time before buffing.
– Use a fine polishing compound and a buffer to achieve a smooth and glossy finish.
– Finally, admire your masterpiece and hit the road in style with a tank that looks like it was done by a pro! So there you have it, folks! With a bit of patience, practice, and the right tools, you too can achieve professional-level tank artistry on your motorcycle. Whether you opt for intricate designs or bold colors, the sky’s the limit when it comes to personalizing your ride. So go ahead, unleash your creativity, and show off your unique style on the open road. Happy painting!


